Trello is a powerful tool for organizing school projects, managing tasks, and collaborating with team members. By using boards, lists, and cards, you can:
- Organize tasks visually to track progress in real-time.
- Collaborate efficiently by assigning tasks, commenting, and attaching files.
- Set deadlines and reminders to keep projects on track.
- Integrate with Power-Ups like Google Drive, Slack, and Calendar to enhance functionality.
Step 1: Create a Board
- Create a New Board:
On your Trello homepage, click Create New Board. Choose a board name based on your project (e.g., “Parent-Teacher Conference,” “Curriculum Development,” “School Event Planning”).

- Choose a Background:
You can select a color or image as a background for your board to make it visually appealing and easy to navigate. - Set Privacy Settings:
Decide whether you want the board to be private (only members you invite can see it), workspace-visible, or public.

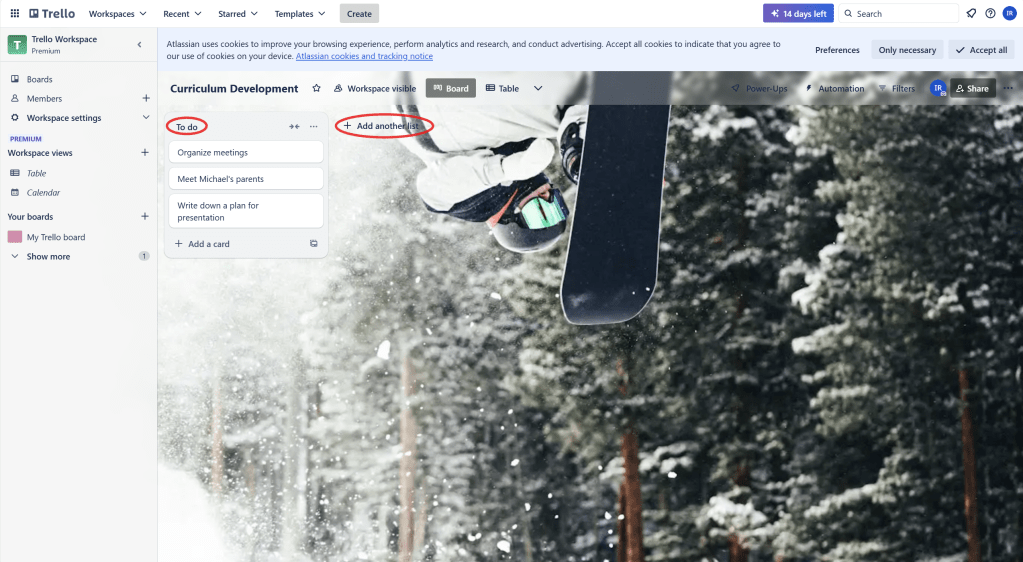
Step 2: Create Lists within Your Board
- Add Lists to Your Board:
A list is a container for cards. Typically, you might have lists like:- To Do
- In Progress
- Completed You can add lists by clicking on Add a list on your board.
- Organize Your Tasks:
You can create additional lists based on your workflow or project stages. For example, in a Parent-Teacher Conference board, you might have:- To Do (tasks that need to be done)
- In Progress (tasks being worked on)
- Completed (tasks that are done)
- Waiting for Approval (if tasks need review before completion)
Step 3: Create Cards for Tasks
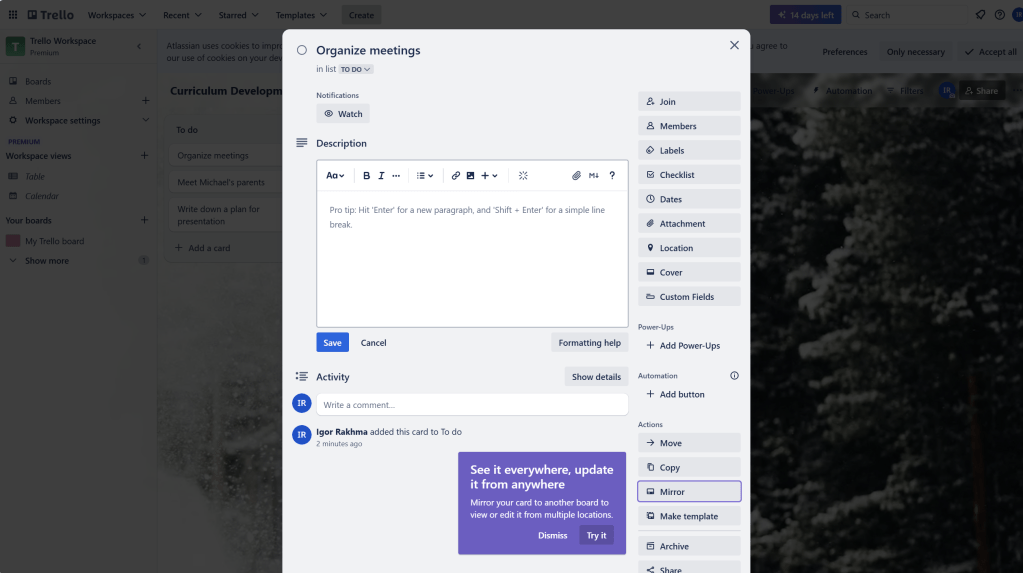
- Create Cards:
In each list, click Add a card and give it a descriptive title. Cards represent individual tasks or steps within a project. - Assign Tasks:
Click on a card to open it. Here you can:- Add descriptions for the task. Assign team members to the task by clicking the Members option. Set deadlines to keep tasks on schedule. Attach files like documents, images, or spreadsheets to the card for easy access. Add labels to categorize the card (e.g., “High Priority,” “Low Priority,” “Admin,” “Teachers”).
In the “Parent-Teacher Conference” project, you might have cards like:- “Send out parent invitations”
- “Create presentation slides”
- “Set up virtual meeting rooms”
- “Prepare student progress reports”
Part 2: Collaboration and Tracking Progress
Step 1: Add Comments and Checklists to Cards
- Add Comments:
Team members can comment on cards to discuss progress, provide updates, or ask questions. Click on a card and scroll down to the comment section to add a message. - Create Checklists:
For tasks that require multiple steps, you can add a checklist inside a card.
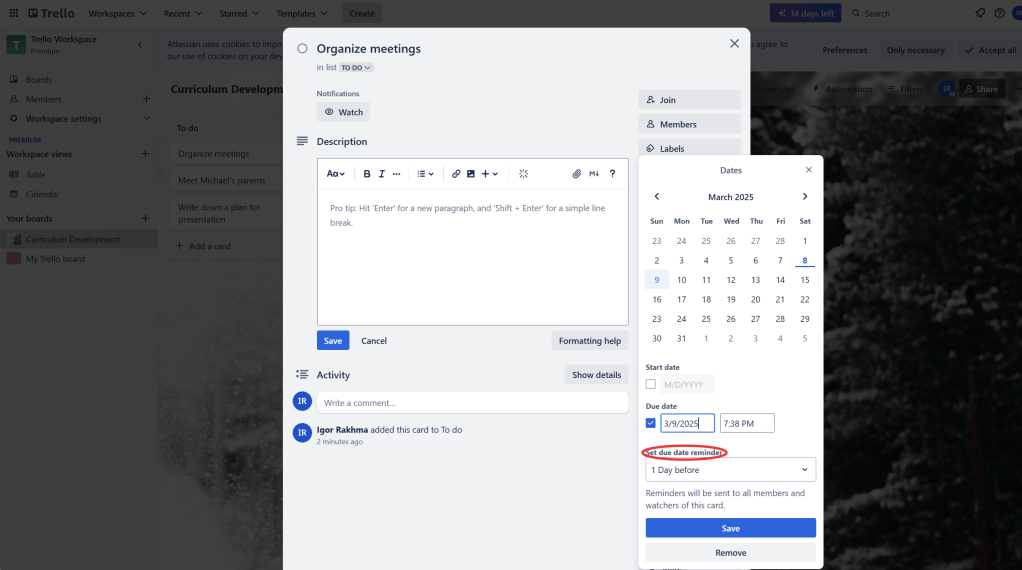
Step 2: Use Due Dates and Reminders
- Set Due Dates:
For each card, you can add a due date to keep track of when tasks need to be completed. Trello will notify team members about upcoming due dates. - Set Notifications:
You can receive notifications about task deadlines, changes to cards, or team comments via email or the Trello mobile app.
Part 3: Advanced Collaboration Features
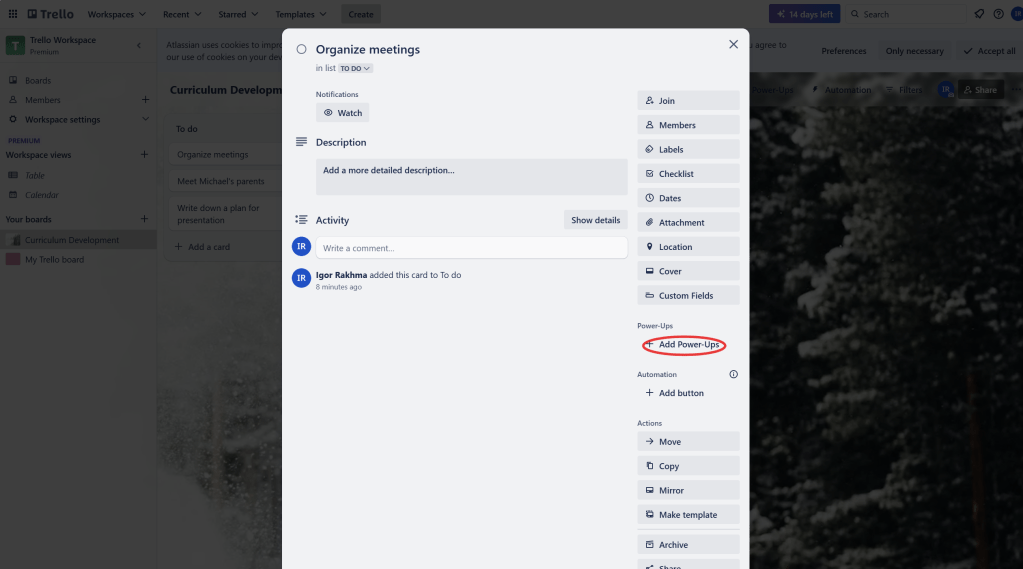
Step 1: Integrating Power-Ups (Optional)
Trello allows you to use Power-Ups to add extra functionality to your boards. Some useful Power-Ups for school projects include:
- Google Drive: Attach files directly from Google Drive and sync with Trello.
- Calendar: View due dates and deadlines on a calendar view to help plan and track tasks.
- Slack: Integrate Trello with Slack to get real-time notifications in your team’s Slack channels.
To enable a Power-Up, click on Show Menu on the right, then Power-Ups, and search for the ones you need.
Step 2: Monitor Task Progress
- Move Cards Between Lists:
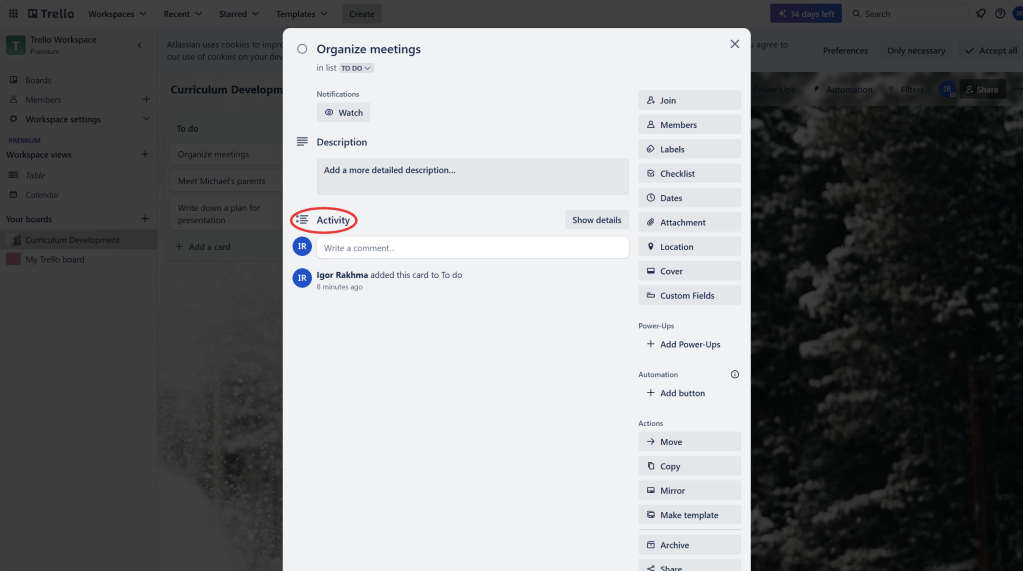
As tasks progress, move cards from To Do to In Progress to Completed by simply dragging and dropping them between lists. - Track Progress with Card Activity:
Each card has an Activity Log that tracks all actions (comments, due dates, etc.) made on the card. This helps team members see what’s been done and what’s pending.
Part 4: Finalizing and Sharing the Board
Step 1: Share the Board
- Invite Team Members:
To collaborate on your board, click Invite at the top of the board and enter the email addresses of the team members you want to invite. - Export the Board:
If you want to export your board for reporting or sharing purposes, Trello offers Export to CSV (available in paid plans) or you can use Trello’s printing feature to create a hard copy of your board.

