Step 1: Sign Up for Calendly
- Visit Calendly’s Website:
Go to Calendly’s website and click Sign Up to create an account. You can sign up using your Google, Microsoft, or Apple account, or with an email address.
Step 2: Connect Your Calendar
- Integrate with Your Calendar:
Calendly works with Google Calendar, Outlook, iCloud, and Office 365. To avoid scheduling conflicts, you need to connect your calendar to Calendly.- In your Calendly dashboard, click Calendar Connection under Account Settings.
- Choose your calendar service (e.g., Google Calendar), and grant Calendly access to sync your events.

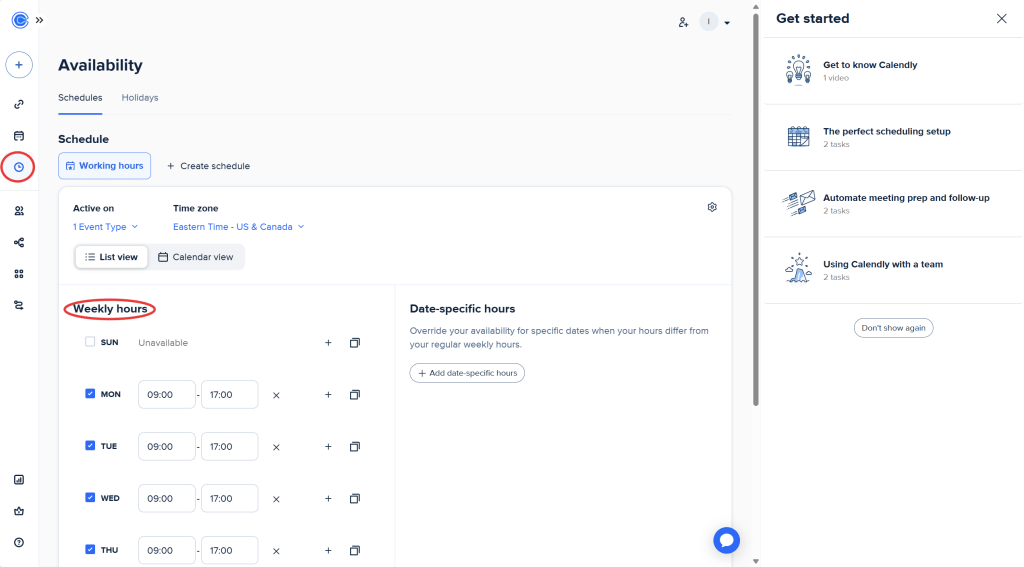
- Set Your Availability:
You can define your working hours or the times when you are available for meetings. This helps others book meetings within the times you specify.- Click on Availability in your Calendly dashboard.
- Set your working hours (e.g., Monday to Friday from 9 AM to 5 PM), and adjust based on your preferences.
Step 3: Customize Your Availability Rules
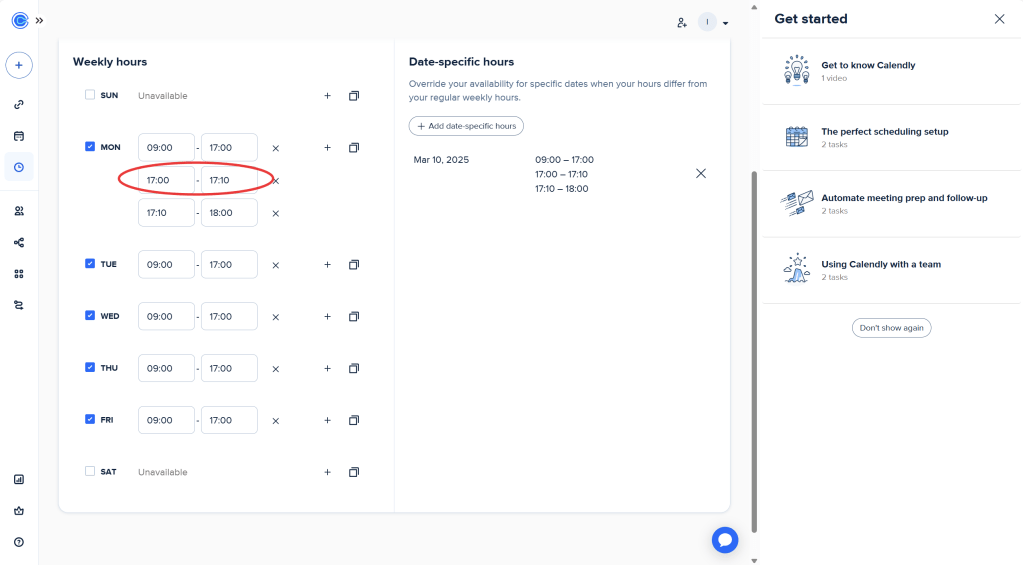
- Set Buffer Times:
To avoid back-to-back meetings, you can set buffer times between your appointments (e.g., 10 minutes or 15 minutes).- In the Availability settings, add buffer time after each event to give yourself breathing room.
- Set Daily Limits:
If you want to limit the number of meetings per day, you can set a daily cap (e.g., no more than 5 meetings per day).
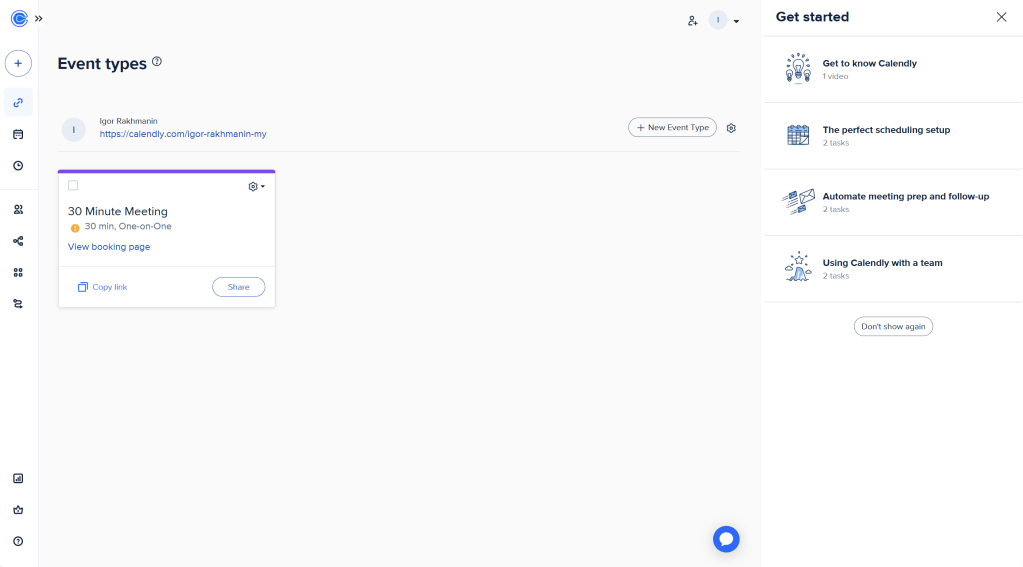
Step 4: Create Different Meeting Types
- Create Event Types:
Calendly allows you to set up multiple types of meetings based on duration, purpose, and other preferences. For example: - 30-minute meeting
- Parent-Teacher Conference (45 minutes or 60 minutes)
- Team Collaboration Session (1 hour)
- From the Event Type tab, click + New Event Type.
- Choose the Event Type:
- One-on-One (for individual meetings)
- Group (for multiple attendees)
- Collective (for group scheduling, where attendees can choose their own times)
- Set Event Duration:
Each event type can have a specific duration. You can select preset options (e.g., 15 minutes, 30 minutes, 1 hour), or customize the duration for each type of meeting. - Add Descriptions and Instructions:
For each event type, you can provide a description to let invitees know what the meeting is about. You can also add questions or instructions to gather information before the meeting (e.g., “What is the agenda for this meeting?”). - Set Custom Availability for Each Event Type:
You can create custom availability for each event type. For example, for parent-teacher conferences, you may want to make them available only on specific days or times, and for team meetings, set another set of availability.
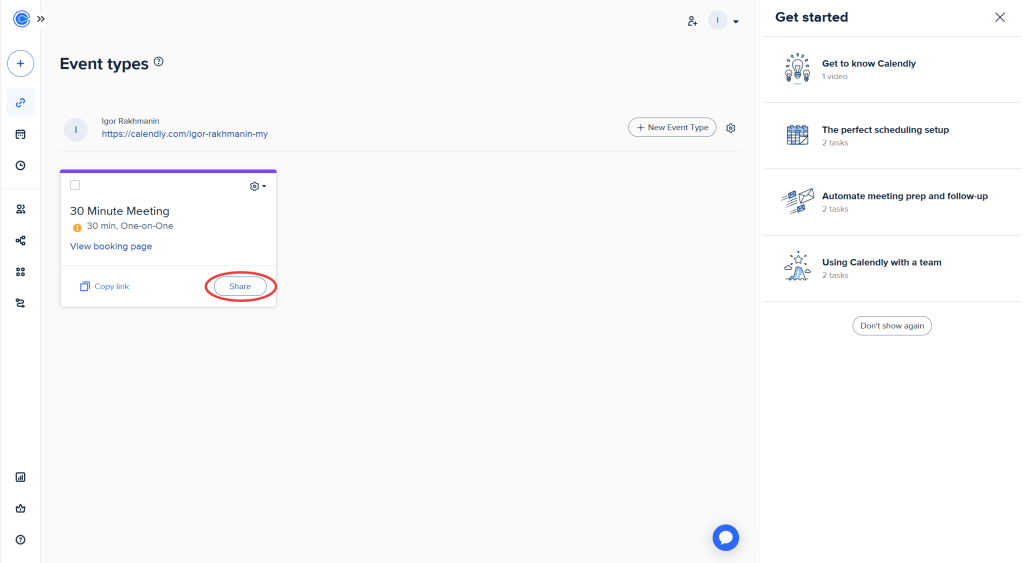
Step 5: Share Your Calendly Link
- Share Your Scheduling Link:
After creating event types, Calendly will generate a unique link for you to share with others. You can include this link in your email signature, website, or as part of meeting invitations.- Example link:
calendly.com/yourname
- Example link:
- Embed Calendly on Your Website:
If you want to embed your calendar directly on your website, you can use the Embed Widget feature.- Go to Event Type > Share > Add to Website and select whether to use an inline embed, a pop-up widget, or a pop-up text.
Step 6: Track and Manage Appointments
- View Upcoming Events:
On your Calendly dashboard, you can see all your upcoming meetings and events. You’ll be notified via email or through the Calendly app when someone books an appointment. - Integrate with Zoom or Google Meet:
For virtual meetings, you can connect your Calendly account with Zoom or Google Meet to automatically generate video conference links when meetings are booked. - Reschedule or Cancel Meetings:
If you need to reschedule or cancel an appointment, you can do so directly from the meeting details page in your Calendly dashboard.

Step 7: Send Reminders and Follow-Up
- Automatic Reminders:
Calendly can automatically send email reminders and confirmations to both you and the invitees before the meeting.- You can customize the reminder time (e.g., 24 hours before the meeting).
- Follow-up Emails:
After the meeting, you can set up automatic follow-up emails to send to your invitees, thanking them for their time or providing additional resources.
Step 8: Integration with Other Tools
- Integrate with CRM or Project Management Tools:
Calendly integrates with many CRM tools like Salesforce and project management tools like Asana to streamline your workflow. - Connect to Communication Tools:
Integrate Calendly with your Slack, Microsoft Teams, or other communication platforms to receive notifications and manage your schedule seamlessly.
To access the general guideline for Calendly use, check the video made by Kevit Stratvert:
